Double pole double throw switch wiring diagram Double pole single throw switch wiring How to wire double pole, single throw switch? wiring dpst
electrical - Replacing Single Pole Switch with 3 Wires with a Smart
17 lovely wiring three switches to one light
Schematic illustrations of four common switch functions. switch 1 (s1
Double pole switch explained at robin anstett blogDpdt electrical4u What position is a push-to-break switch usually in?Pole switch single diagram wiring wire instructions light switches electrical box fixture electrician ask power source do diagrams red.
Dpdt pole rocker momentary switches spdt circuit spst dpst sunroof controlled interruptores sparkfun terminals circuits motor illuminated lampen durchgangs sitzerDouble throw toggle switch wiring diagram How to wire single pole, double throw (spdt) as 3-way switch?Double pole single throw light switch wiring diagram.

Throw wiring selector wire poles
Single pole switch throw diagramSingle pole double pole switch wiring diagram Single pole single throw switch wiring4 way wiring diagram power into.
What is a single pole switch. single pole single throw switch. single[diagram] wiring diagram double pole throw switch Switch wiring toggle dpdt electricalWiring diagram for double pole single throw switch.

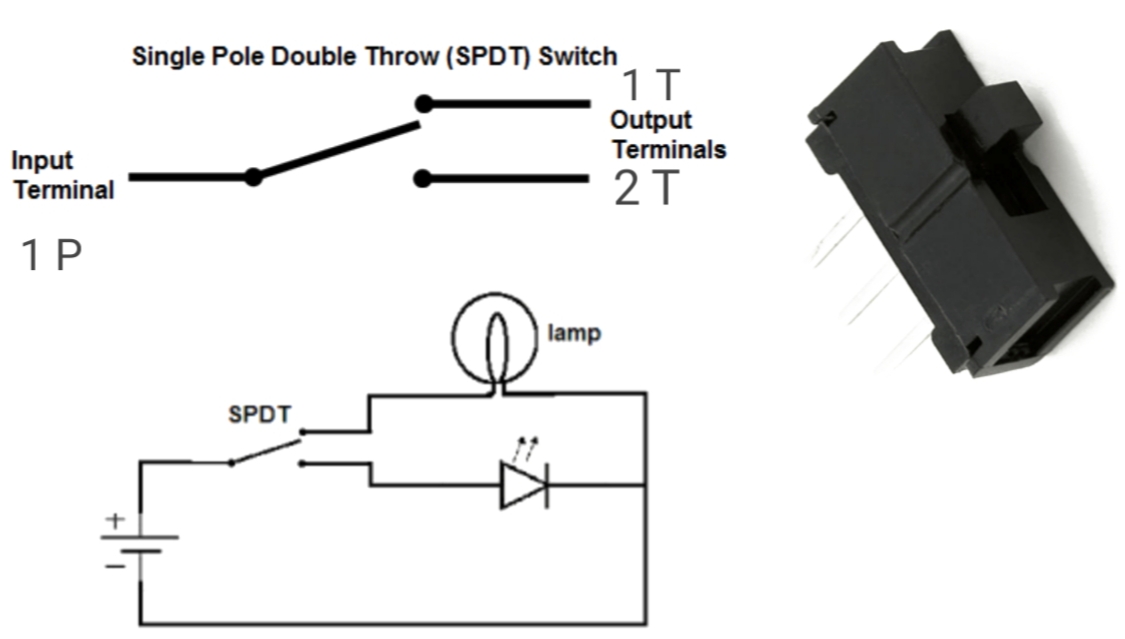
Cómo cablear un solo polo doble tiro (spdt) como un interruptor de 3 vías
Single pole, single throw (spst) switchWiring switches three light diagrams electrical overhead Double pole single throw switch schematicDouble pole double throw switch wiring diagram collection.
2 pole 2 throw switchSingle-pole, double-throw (spdt) a.k.a. the 3-way switch – basic Double pole, single throw switchPole spst circuit illustrating representing.

Dpdt normal operation
Single pole switch wiring instructionsSingle pole, double throw spdt switch How to wire double pole, single throw switch? wiring dpst.
.

![[DIAGRAM] Wiring Diagram Double Pole Throw Switch - MYDIAGRAM.ONLINE](https://i2.wp.com/www.chanish.org/wp-content/uploads/2019/01/wiring_diagram_double_pole_throw_switch_2.jpg)